Getting Started
This guide lets you quickly evaluate Istio. If you are already familiar with Istio or interested in installing other configuration profiles or advanced deployment models, refer to our which Istio installation method should I use? FAQ page.
You will need a Kubernetes cluster to proceed. If you don’t have a cluster, you can use kind or any other supported Kubernetes platform.
Follow these steps to get started with Istio:
- Download and install Istio
- Install the Kubernetes Gateway API CRDs
- Deploy the sample application
- Open the application to outside traffic
- View the dashboard
Download Istio
Go to the Istio release page to download the installation file for your OS, or download and extract the latest release automatically (Linux or macOS):
$ curl -L https://istio.io/downloadIstio | sh -Move to the Istio package directory. For example, if the package is
istio-1.29.0:$ cd istio-1.29.0The installation directory contains:
- Sample applications in
samples/ - The
istioctlclient binary in thebin/directory.
- Sample applications in
Add the
istioctlclient to your path (Linux or macOS):$ export PATH=$PWD/bin:$PATH
Install Istio
For this guide, we use the demo
configuration profile. It is
selected to have a good set of defaults for testing, but there are other
profiles for production, performance testing or OpenShift.
Unlike Istio Gateways, creating
Kubernetes Gateways will, by default, also
deploy gateway proxy servers.
Because they won’t be used, we disable the deployment of the default Istio gateway services that
are normally installed as part of the demo profile.
Install Istio using the
demoprofile, without any gateways:$ istioctl install -f @samples/bookinfo/demo-profile-no-gateways.yaml@ -y ✔ Istio core installed ✔ Istiod installed ✔ Installation complete Made this installation the default for injection and validation.Add a namespace label to instruct Istio to automatically inject Envoy sidecar proxies when you deploy your application later:
$ kubectl label namespace default istio-injection=enabled
namespace/default labeled
Install the Kubernetes Gateway API CRDs
The Kubernetes Gateway API CRDs do not come installed by default on most Kubernetes clusters, so make sure they are installed before using the Gateway API.
Install the Gateway API CRDs, if they are not already present:
$ kubectl get crd gateways.gateway.networking.k8s.io &> /dev/null || \
{ kubectl kustomize "github.com/kubernetes-sigs/gateway-api/config/crd?ref=v1.4.0" | kubectl apply -f -; }
Deploy the sample application
You have configured Istio to inject sidecar containers into any application you deploy in your default namespace.
Deploy the
Bookinfosample application:$ kubectl apply -f @samples/bookinfo/platform/kube/bookinfo.yaml@ service/details created serviceaccount/bookinfo-details created deployment.apps/details-v1 created service/ratings created serviceaccount/bookinfo-ratings created deployment.apps/ratings-v1 created service/reviews created serviceaccount/bookinfo-reviews created deployment.apps/reviews-v1 created deployment.apps/reviews-v2 created deployment.apps/reviews-v3 created service/productpage created serviceaccount/bookinfo-productpage created deployment.apps/productpage-v1 createdThe application will start. As each pod becomes ready, the Istio sidecar will be deployed along with it.
$ kubectl get services
NAME          TYPE        CLUSTER-IP      EXTERNAL-IP   PORT(S)    AGE
details       ClusterIP   10.0.0.212      <none>        9080/TCP   29s
kubernetes    ClusterIP   10.0.0.1        <none>        443/TCP    25m
productpage   ClusterIP   10.0.0.57       <none>        9080/TCP   28s
ratings       ClusterIP   10.0.0.33       <none>        9080/TCP   29s
reviews       ClusterIP   10.0.0.28       <none>        9080/TCP   29s
and
$ kubectl get pods
NAME                              READY   STATUS    RESTARTS   AGE
details-v1-558b8b4b76-2llld       2/2     Running   0          2m41s
productpage-v1-6987489c74-lpkgl   2/2     Running   0          2m40s
ratings-v1-7dc98c7588-vzftc       2/2     Running   0          2m41s
reviews-v1-7f99cc4496-gdxfn       2/2     Running   0          2m41s
reviews-v2-7d79d5bd5d-8zzqd       2/2     Running   0          2m41s
reviews-v3-7dbcdcbc56-m8dph       2/2     Running   0          2m41s
Note that the pods show
READY 2/2, confirming they have their application container and the Istio sidecar container.Validate that the app is running inside the cluster by checking for the page title in the response:
$ kubectl exec "$(kubectl get pod -l app=ratings -o jsonpath='{.items[0].metadata.name}')" -c ratings -- curl -sS productpage:9080/productpage | grep -o "<title>.*</title>"
<title>Simple Bookstore App</title>
Open the application to outside traffic
The Bookinfo application is deployed, but not accessible from the outside. To make it accessible, you need to create an ingress gateway, which maps a path to a route at the edge of your mesh.
Create a Kubernetes Gateway for the Bookinfo application:
$ kubectl apply -f @samples/bookinfo/gateway-api/bookinfo-gateway.yaml@
gateway.gateway.networking.k8s.io/bookinfo-gateway created
httproute.gateway.networking.k8s.io/bookinfo created
By default, Istio creates a
LoadBalancerservice for a gateway. As we will access this gateway by a tunnel, we don’t need a load balancer. If you want to learn about how load balancers are configured for external IP addresses, read the ingress gateways documentation.Change the service type to
ClusterIPby annotating the gateway:$ kubectl annotate gateway bookinfo-gateway networking.istio.io/service-type=ClusterIP --namespace=defaultTo check the status of the gateway, run:
$ kubectl get gateway
NAME               CLASS   ADDRESS                                            PROGRAMMED   AGE
bookinfo-gateway   istio   bookinfo-gateway-istio.default.svc.cluster.local   True         42s
Access the application
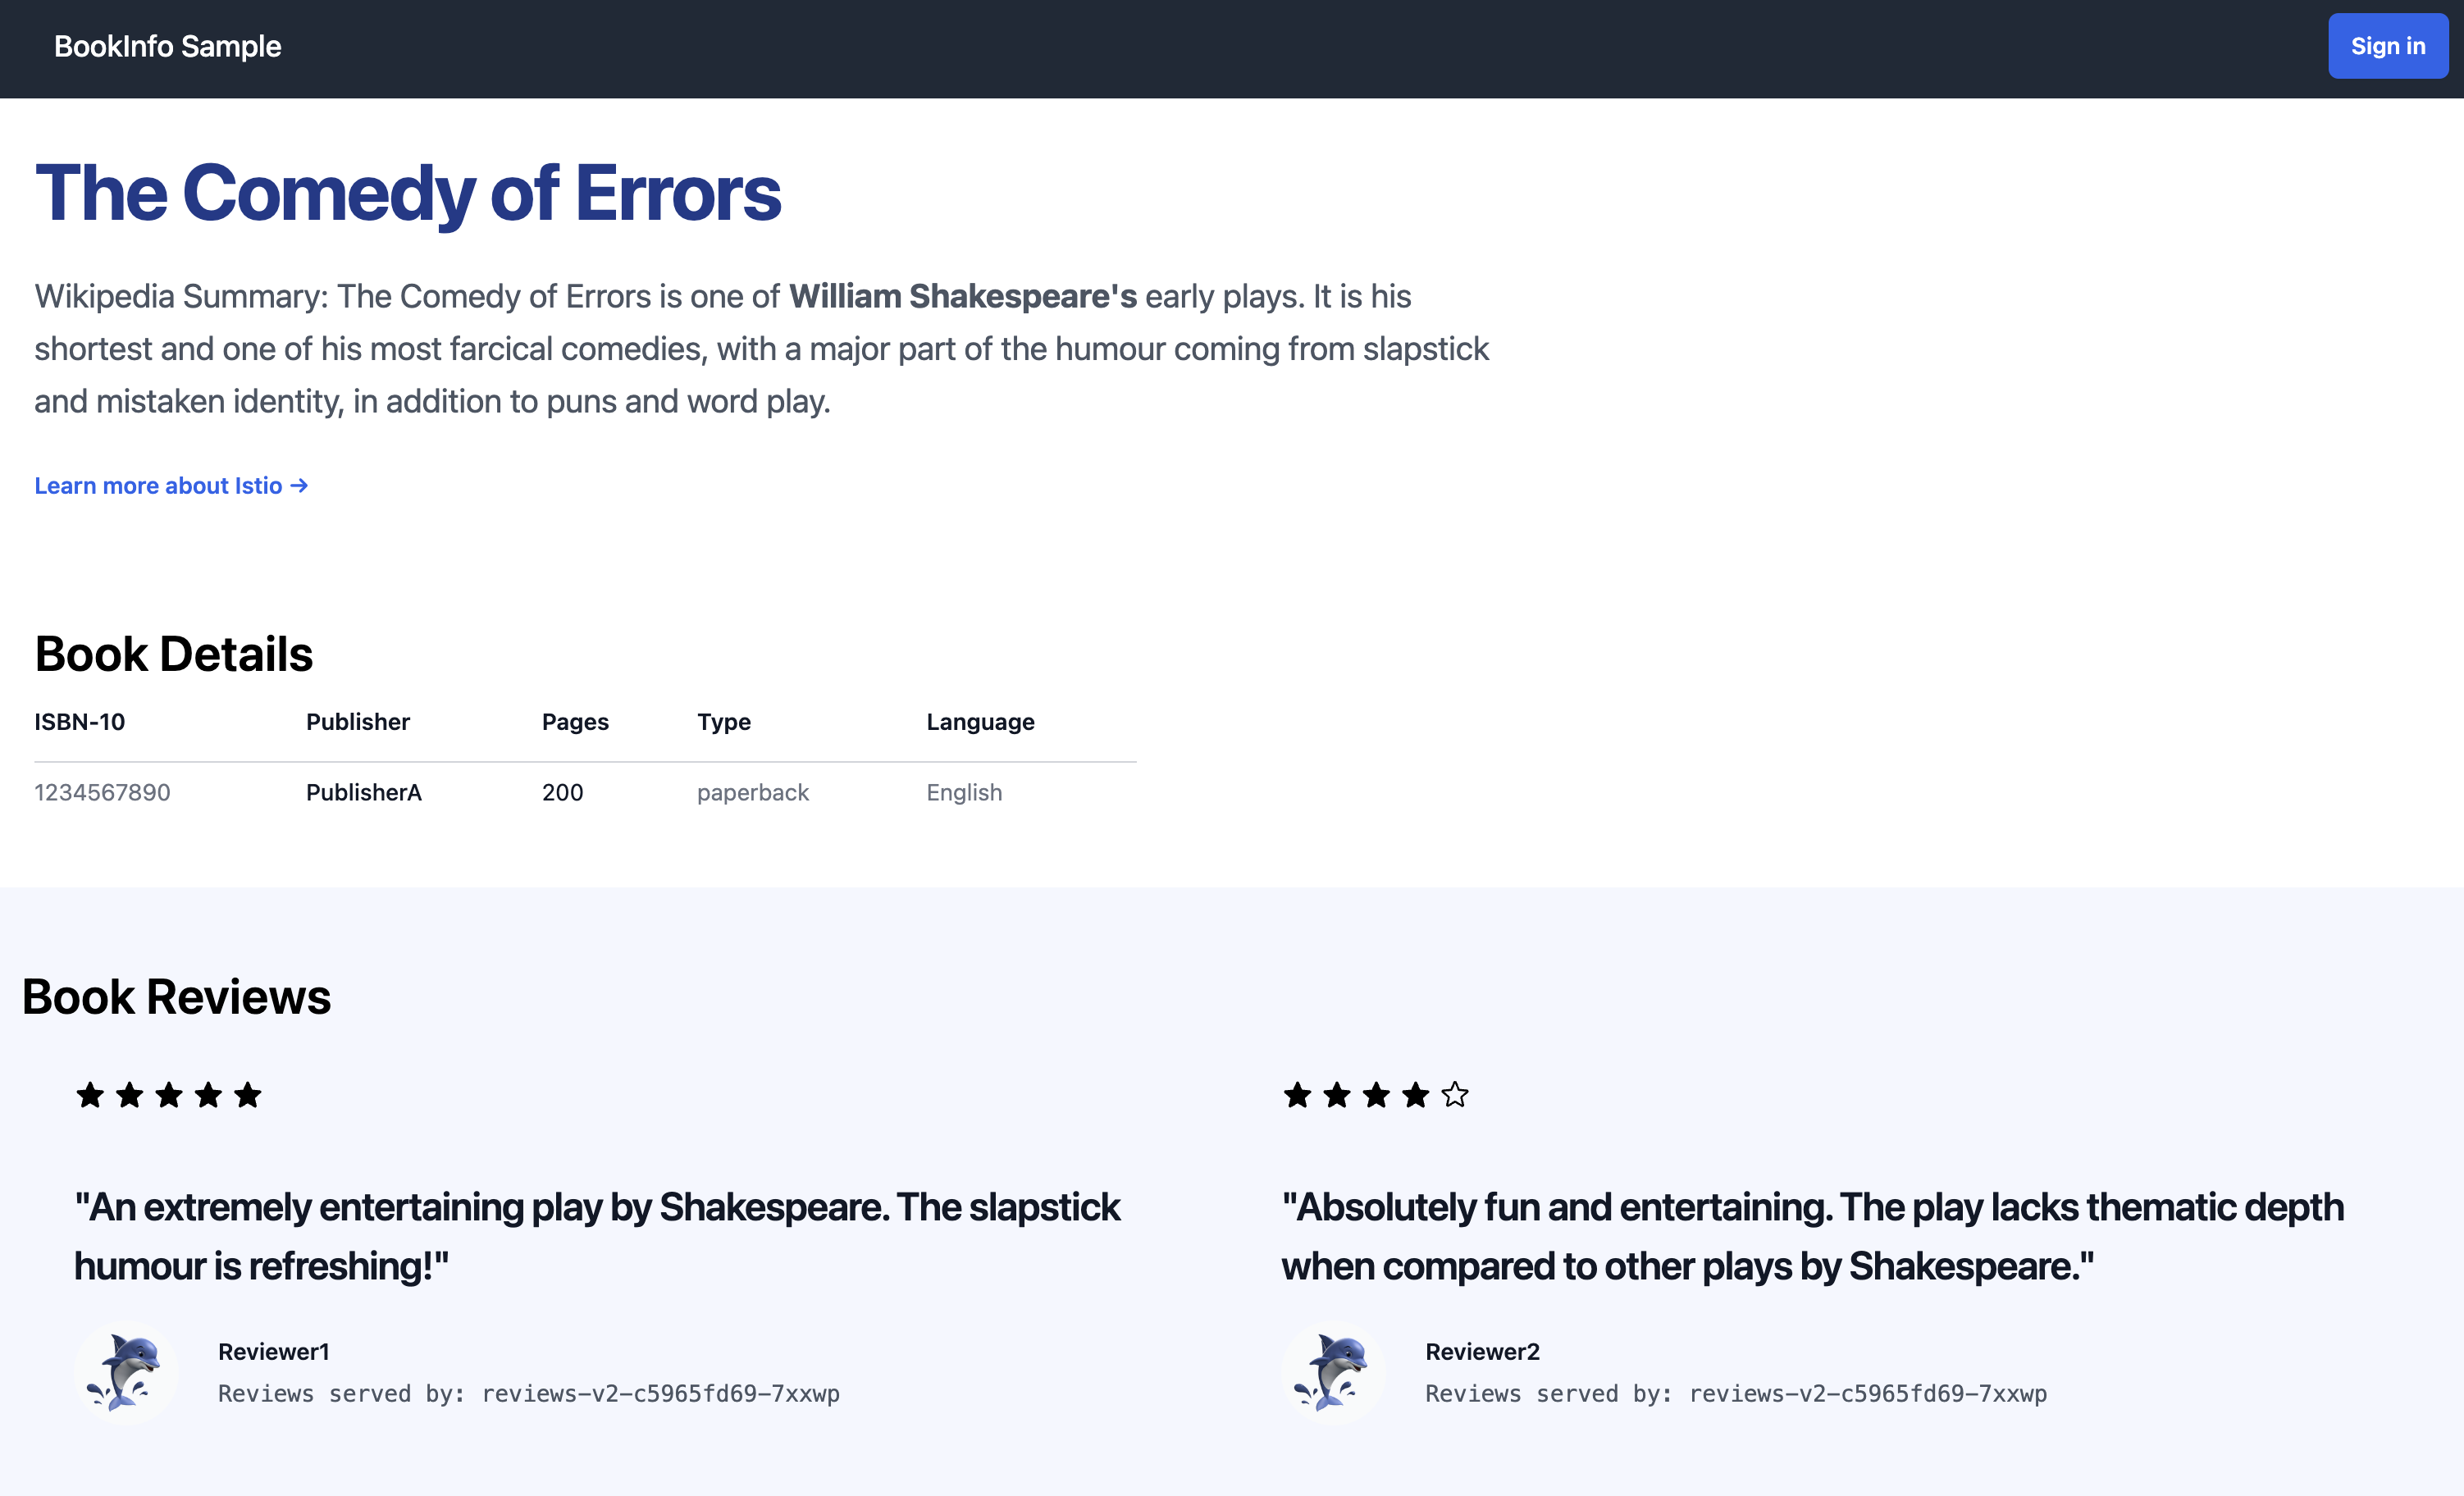
You will connect to the Bookinfo productpage service through the gateway you just provisioned. To access the gateway, you need to use the kubectl port-forward command:
$ kubectl port-forward svc/bookinfo-gateway-istio 8080:80Open your browser and navigate to http://localhost:8080/productpage to view the Bookinfo application.
If you refresh the page, you should see the book reviews and ratings changing as the requests are distributed across the different versions of the reviews service.
View the dashboard
Istio integrates with several different telemetry applications. These can help you gain an understanding of the structure of your service mesh, display the topology of the mesh, and analyze the health of your mesh.
Use the following instructions to deploy the Kiali dashboard, along with Prometheus, Grafana, and Jaeger.
Install Kiali and the other addons and wait for them to be deployed.
$ kubectl apply -f @samples/addons/kiali.yaml@
$ kubectl rollout status deployment/kiali -n istio-system
Waiting for deployment "kiali" rollout to finish: 0 of 1 updated replicas are available...
deployment "kiali" successfully rolled out
Access the Kiali dashboard.
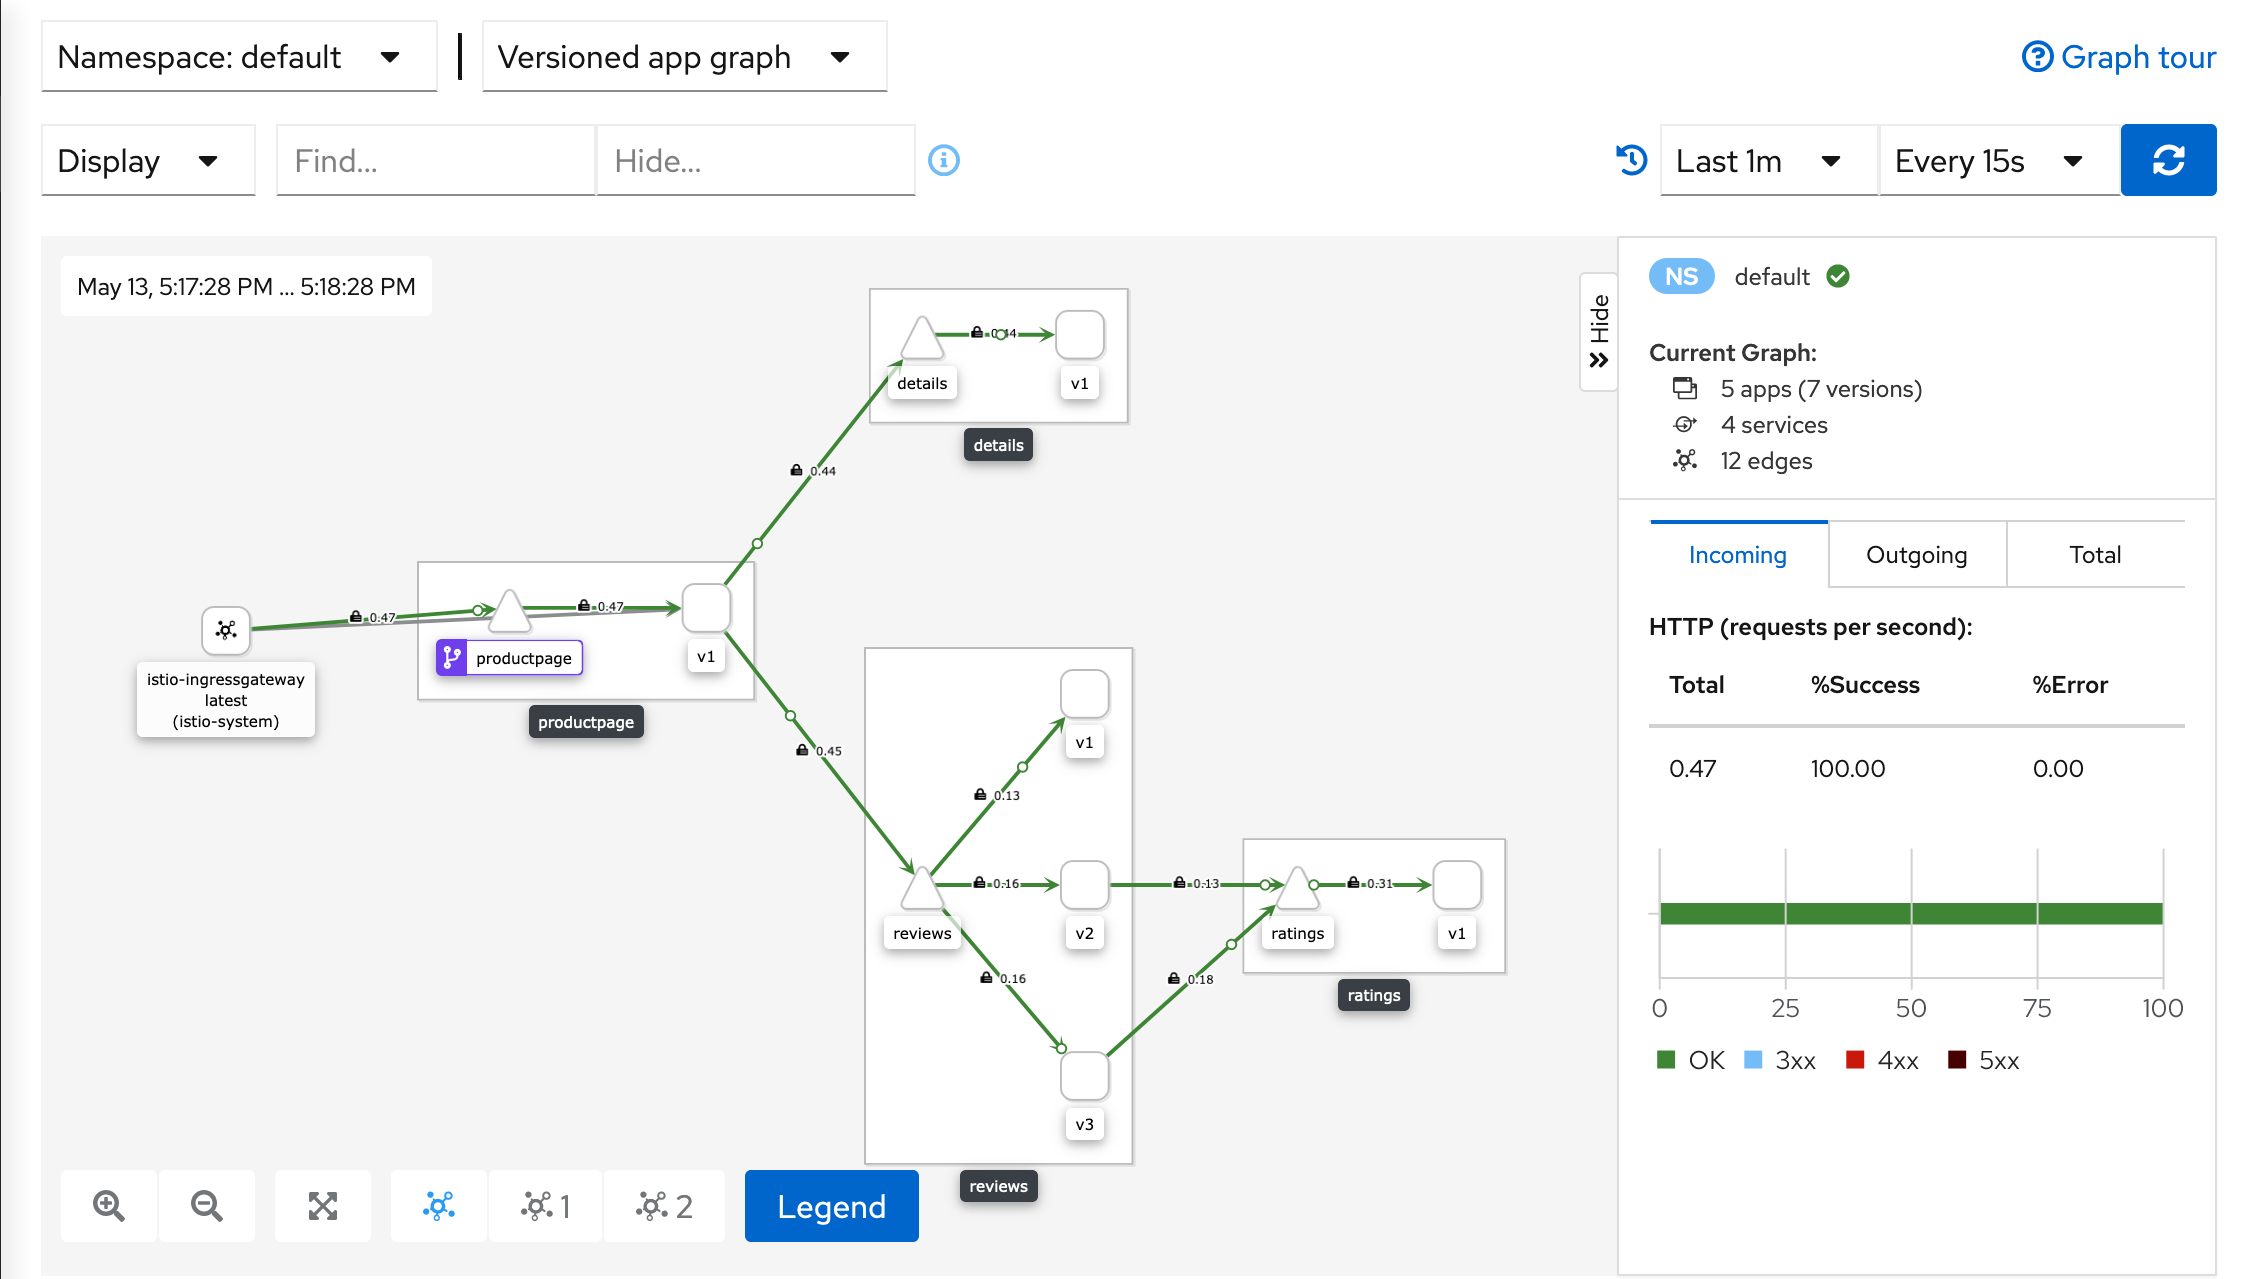
$ istioctl dashboard kialiIn the left navigation menu, select Graph and in the Namespace drop down, select default.
The Kiali dashboard shows an overview of your mesh with the relationships between the services in the
Bookinfosample application. It also provides filters to visualize the traffic flow.Kiali Dashboard
Next steps
Congratulations on completing the evaluation installation!
These tasks are a great place for beginners to further evaluate Istio’s
features using this demo installation:
- Request routing
- Fault injection
- Traffic shifting
- Querying metrics
- Visualizing metrics
- Accessing external services
- Visualizing your mesh
Before you customize Istio for production use, see these resources:
Join the Istio community
We welcome you to ask questions and give us feedback by joining the Istio community.
Uninstall
To delete the Bookinfo sample application and its configuration, see
Bookinfo cleanup.
The Istio uninstall deletes the RBAC permissions and all resources hierarchically
under the istio-system namespace. It is safe to ignore errors for non-existent
resources because they may have been deleted hierarchically.
$ kubectl delete -f @samples/addons@
$ istioctl uninstall -y --purge
The istio-system namespace is not removed by default.
If no longer needed, use the following command to remove it:
$ kubectl delete namespace istio-systemThe label to instruct Istio to automatically inject Envoy sidecar proxies is not removed by default. If no longer needed, use the following command to remove it:
$ kubectl label namespace default istio-injection-If you installed the Kubernetes Gateway API CRDs and would now like to remove them, run one of the following commands:
If you ran any tasks that required the experimental version of the CRDs:
$ kubectl kustomize "github.com/kubernetes-sigs/gateway-api/config/crd/experimental?ref=v1.4.0" | kubectl delete -f -Otherwise:
$ kubectl kustomize "github.com/kubernetes-sigs/gateway-api/config/crd?ref=v1.4.0" | kubectl delete -f -

